Tasks - this is the official list.
Please indicate the task number for each of your blog responses.
1) Create a blog.
2) Put link into Moodle wiki. (Moodle not ready yet.)
3)Fill in rest of your details on Moodle wiki
4)Check out all the sites related to the list in the embedded notices blog.
Write a sentence about what each one does. You don't have to be very familiar with each one.
(The blog entry is: TUESDAY, FEBRUARY 16, 2010)
5) Find 4 more Arduino LED related videos in Youtube, BlipTV etc. Put a link and a two-sentence review about each one in your blog. Be prepared to talk about one or more of them.
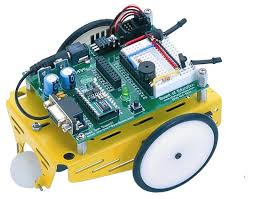
6) Establish a sketchpad folder in the D Drive or in a USB pen.
7)Write the original Blink program and save into a sketchpad folder.
8) Write a variation of blink that has led mostly off. Just winking on quickly.
9) Ditto but have the LED mostly on.
10)Get the led to blink at rate of 10ms on 10ms off. Can you see it blinking?
What is your cutoff point? Is this different from one other student?
Put your programs and your comments into your blog. Pictures and diagrams are good.
11) Check out the Blink2 program elsewhere in this blog. Run it and paste into your blog.
The following tasks are variations on Blink2.
12) Make one of the LEDs blink when the other one is off.
13) Get one to blink mostly on and the other is mostly off. "Mostly on" means it's on all the time except for a little flash off about once a second.
14) Like 13 but the LEDs are reversed. That is, the one that mostly on is now mostly off.
16) Get one led to blink twice then the other one to blink once then repeat forever.
17) Write a for-loop with counter variable i. Get one led to blink 5 times, using the for-loop, then the other to blink once. Repeat forever.
18) Like 17 but i can be any value. Try different ones. Later we can input this value from the keyboard.
19) Write a program to get one led to increase its rate of blinking from 100ms to1sec.
20) Same as 19 but this time ramp up the rate from 10ms to 1 sec then back down again.
21) Write a program to output one led blinking at rate of 200ms that outputs the word "blink" to the screen each time it comes on.
22) Same as 21 but this time use two leds of different colours and output the colour of the led to the screen each time it goes on. So you should see eg. "red yellow red yellow ..."
24) Go into the ladyada site and look at http://www.ladyada.net/learn/sensors/cds.html which deals with light dependent resistors. Put a link and comment about this page in your blog. Identify your LDR from your pack. You will not be tested on the technical details of this sensor but you'll be expected to insert it into circuits and read off the changing light values. 25) Start a Arduino key words page in your blog. Put every new key word with an explanation and example when you come across it. It should have soon these keywords: setup(), loop(), analogRead(), Serial.print(), Serial.println(). This should be added to throughout the course.
26) Run the ladayada photocell program that was handed out in class. Write it up in your blog about what you did and the program.
27) Same as 26 above but make some changes to improve it. Put your changes into a comment so that it's obvious what the differences are.
28) Write a program to turn a LED on whenever the light is blocked to your LED. You will have to play around with several values.
29) Check out the wikiEducator site that has some example Arduino resources. Read the directions there about doing another one. Create one like it in your blog or create it in wikiEducator by registering and starting your own pages. If your resources page is not in your blog, create a heading and a link to it so that it can be marked. 31) Change the above program by reversing the the way the led goes on/off when the button is pushed/not pushed. Publish your program with a suitable comment.
32) Same as 30 but also output the state of the button and the led to the serial screen. I might see on one line then: "button pressed ....led off".
33) Write up key words pinMode() and digitalRead() in your key words glossary.
34) Write a program to generate 100 random numbers between 0 and 9 to the screen.
35) Same as above but this time put your outputs in a numbered list like this:
1. 7
2. 4
3. 9 etc til you get to 100.
36) Same but also output the average (mean) of the 100 numbers with a suitable message.
37) Same but this time see if you can drive the baud rate up as far as possible before the output data gets scrambled. Also, what is the slowest speed the Arduino serail will ouitput at? Write your findings in your blog.
38) Write a program to output the value of your LDR whenever you press the button.
39) Same as 38 but this time write your output like this :
Reading number 1 is 345
Reading number 2 is 123
Reading number 3 is 876 etc...
40)Find an interesting article on the YABB news section and provide a screen shot and a short report on why you found it interesting.
41) Register for YABB but don't contribute yet. Take a screen shot of part of your registration process to confirm you've done it.
42) Write a short list of rules for a bulletin board like YABB. Watch some thread over two weeks and be ready to make a contribution.
43) You'll need to look at some project sites to get some good ideas for your minor and major projects. Some have been shown in class. Write a list of four good project sites and include a link and a screen shot for each with a comment in your blog.
44) Present to the class a report on one of your assigned devices. You need to tell us what it does and give a little demo of it working on a simple Arduino project. Include in your talk at least three Impress or PowerPoint slides on a USB pen or similar.
45) Explore the way your infrared transmitter sends pulses to the receiver. Set up a little demonstration to be marked in class. You may share this project with another person but both members have to know what's going on. Transmission from one Arduino to another is especially excellent.
------after Easter-----------------
46) Get a plan to send a signal from one Arduino to another. Set one up to receive and one to transmit. Connect the input pin of the receiver to an output pin of the transmitter. Get the receiver to note on the serial screen what it's reading. Get the transmitter to send a slow square wave that can be received and displayed in real human time.
47) Same as 46 but this time reverse roles of sender and receiver.
48) Same as 46 but get the receiving Arduino to send the level, 1 or 0, that it's getting back to the other Arduino. So it's just receiving and sending a copy back for checking. Get both Arduinos to display what they are getting. A one second on/off will work ok.
49) Get one Arduino to send a given series of pulses, say about a 100, about 1ms long, to the other. Get the receiver to count the number of pulses it gets and display this number on the serial screen.
50) How fast can you send a thousand 1/0 pulses and still count them accurately.
========================================================
When you have reached the 50 task target, email Peter Brook with a link to your blog for checking.
========================================================
Next topics will be external interrupts, eeprom reading and writing and data logging.
51) Check out the eeprom read program at http://arduino.cc/en/Reference/EEPROMRead
Get it running and put a screen dump into your blog. They may be all $FFs or all $00's at first.
52) Now run the similar eeprom write program to send $23 to address 01 and $2A to address 02. Add a eeprom dump, all 512 bytes, function to your program based on the eeprom read program above so you can see that your bytes have been changed.
53) Fill the total eeprom with $AB's all 1024 bytes. Read eeprom space back onto your screen and do a screen capture picture for your blog.
--------------------------
Your main effort at this stage should be on getting your tasks up to date, preparing for your software presentation on Arduino commands and getting your minor project finished. The hard deadline for the minor project is May 23rd. There will be one theory test at the end of the course.
54) Data logging. Write a small program that reads a real world signal like light or temperature and takes 10 samples over ten seconds. Output your values to the serial screen.
55) Same but this time store your values in an array called mySamples[] and output the array on completion of the tenth sample.
56) Same as 55 but this time store your values into eeprom then output from there after 5 second delay.
57) Same as 56 but this time write a separate function to find the smallest value and out put that at the end of the sampling with a suitable message.
58) Same as 57 but this time write two functions average() and biggest(). The average function outputs the mean of the values as a floating point number and the other function, biggest(), will output the greatest value that you have sampled.
--Next tasks are to do with longer term data logging over a day or longer.
59) Create an experiment that will log a real-world variable like light or temperature over 24 hours or more. Store your logged values in eeprom and display your values in a useful way. Write up your experiment with photos and movies in your blog.
60) (Stop press: Don't make that presentation but expect question on this in the test.) Make a presentation to the class with at least three slides on one of the function blocks of the mega328. This is a diagram in the blog with the heading "the main parts of the mega 328".